This exercise demonstrates the installation and configuration of Microsoft SQL Server on Linux environment, this is a standalone deployment .
Step 1 – Create “mssql” user
- useradd mssql
Step 2 – Create database directory as /database/mssql
- mkdir /database/mssql
Step 3 – Create data and log folder under the above directory
- mkdir /database/mssql/data
- mkdir /database/mssql/log
Step 4- Change directory ownership to “mssql” account
- chown mssql:mssql /database/mssql/data
- chown mssql:mssql / database/mssql/log

Step 5 – Download Microsoft SQL Server repo file
- sudo curl -o /etc/yum.repos.d/mssql-server.repo https://packages.microsoft.com/config/rhel/8/mssql-server-2019.repo
Step 6 – Install SQL Server
- sudo yum install -y mssql-server
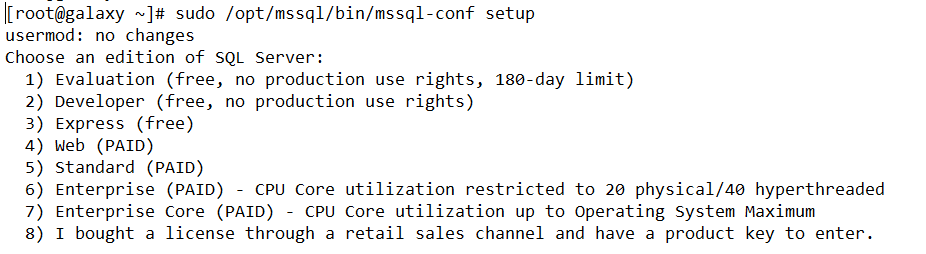
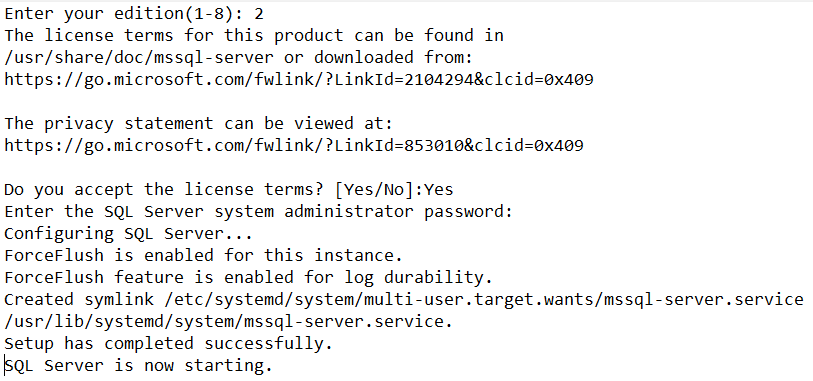
Step 7 – Configure SQL Server
- sudo /opt/mssql/bin/mssql-conf setup
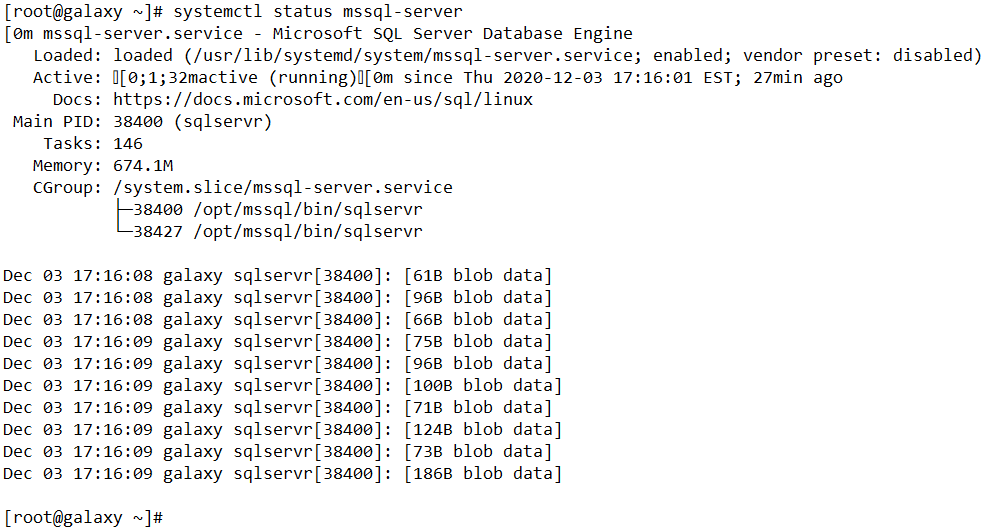
Step 8 – Verify SQL Server is running
- systemctl status mssql-server
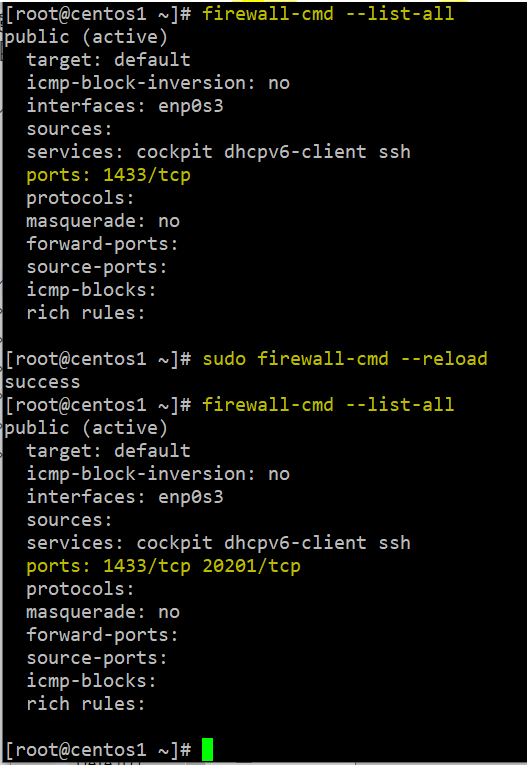
Step 9 – Enable firewall rule for default port 1433
- sudo firewall-cmd –zone=public –add-port=1433/tcp –permanent
- sudo firewall-cmd –reload

Step 10 – Install SQL Server Command line tool
- Download repo file :
- sudo curl -o /etc/yum.repos.d/msprod.repo https://packages.microsoft.com/config/rhel/8/prod.repo
- Install MSSQL tool with unixODBC :
- sudo yum install -y mssql-tools unixODBC-devel
- Update mssql tools
- sudo yum check-update
- sudo yum update mssql-tools
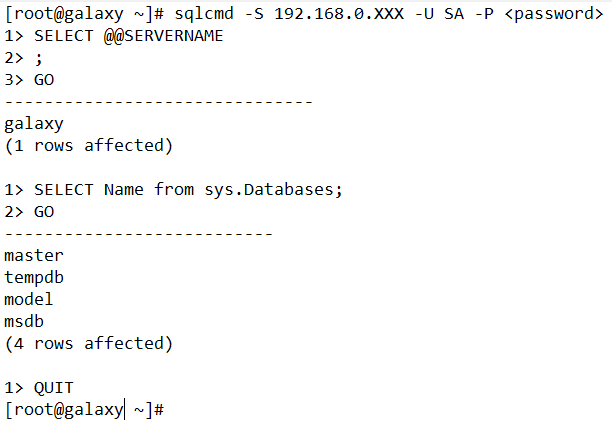
Step 11 – Configure PATH

Step 12 – Test database connection
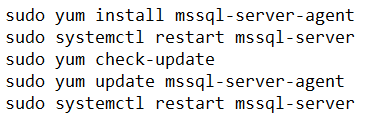
Step 13 – Install SQL Server Agent
- Enable SQL Server Agent

- If you are running SQL Server 2017 CU3 or below, run the command below to install SQL Agent
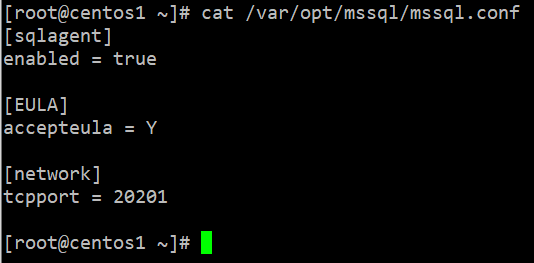
Step 14 – Change Default Port Number
- Change port number to 20201
- sudo /opt/mssql/bin/mssql-conf set network.tcpport 20201